Displaying current and future exhibitions or announcements on the homepage of your website is crucial to inform visitors about upcoming events or other news. In this step-by-step guide, we explain how you can either use our pre-built Loop Carousels to automatically display current and future exhibitions or insert a Slides widget in fullscreen and non-fullscreen for customized content you insert (not automatically).
Tip: Before you start editing, make sure that this element does not already exist on your homepage, e.g. as a header slider, so that you do not insert it twice.
Automatic announcement of current and future exhibitions with Loop Carousels
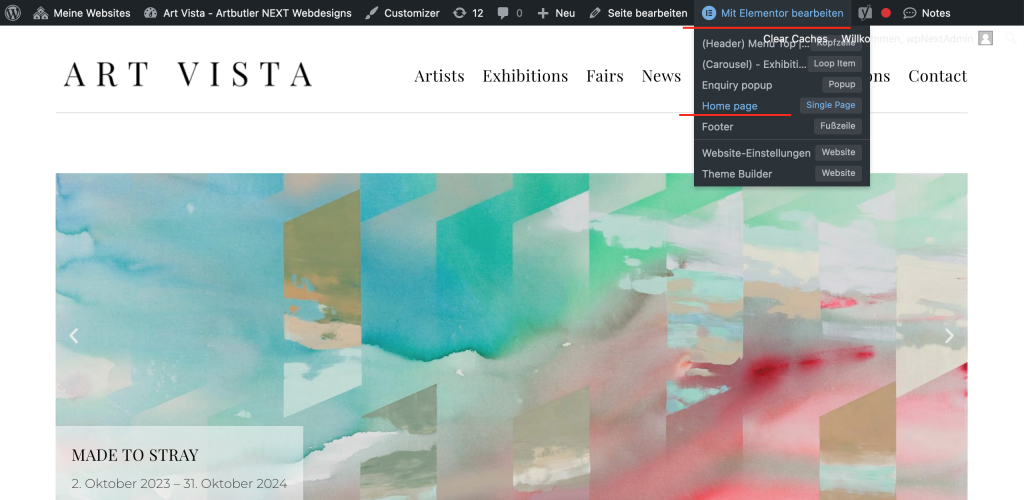
- Log in to the WordPress account: Log in to your WordPress admin area.
- Navigate to the homepage: Open the homepage of your website.
- Open Elementor: Go with the mouse pointer to “Edit with Elementor” and a menu will open – here you now click on “Home page”. Now you can start editing your home page.
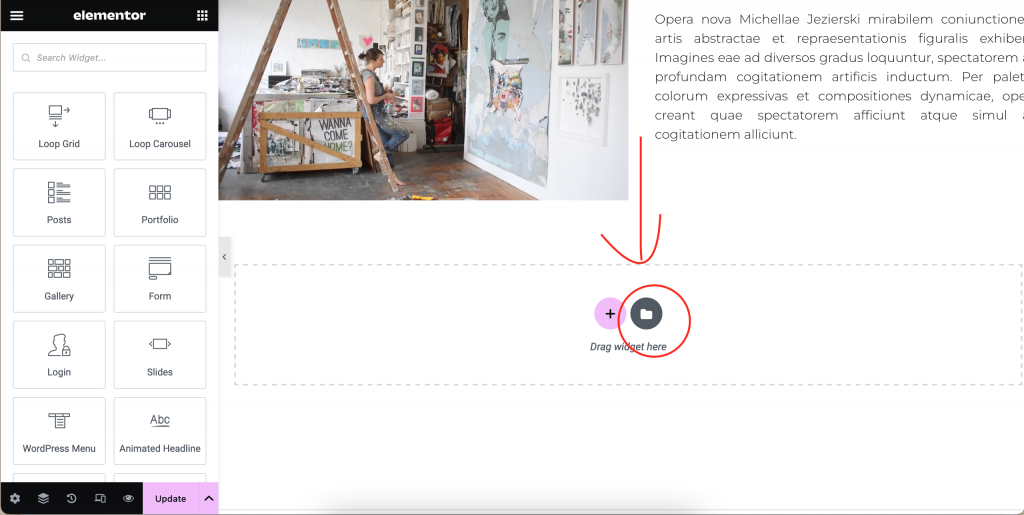
4. Scroll down to the bottom of the page and click on “Add Templates Symbol” in the dotted block in the Elementor editor.
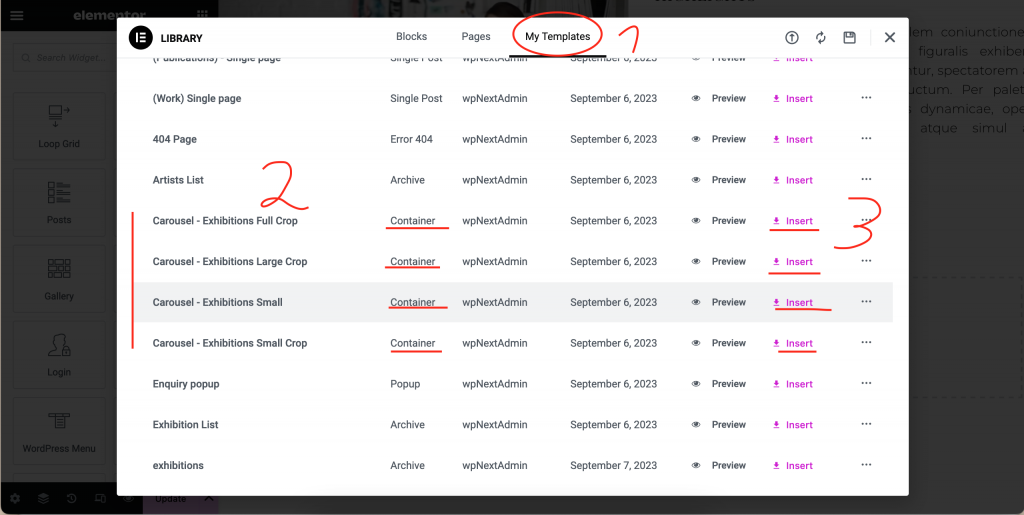
5. Navigate to “My Templates” (1.) and insert one of the container templates with the prefix “Carousel” (2.) via “Insert” (3.). Decide which of the four elements you want to use depending on the size and trim.
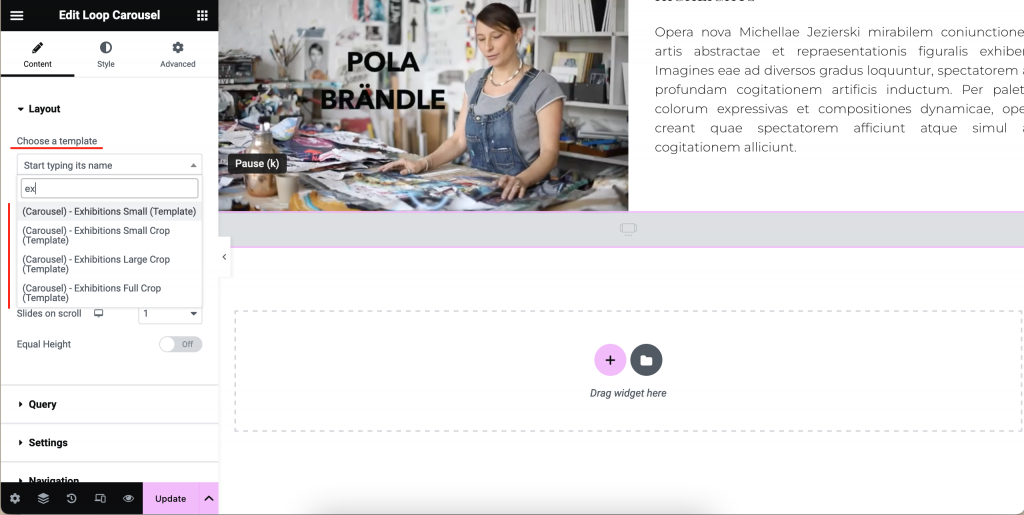
6. You will find a loop carousel in the inserted block. Use “Choose a template” to select the same template as before for the container (e.g. “Exhibitions Small”).
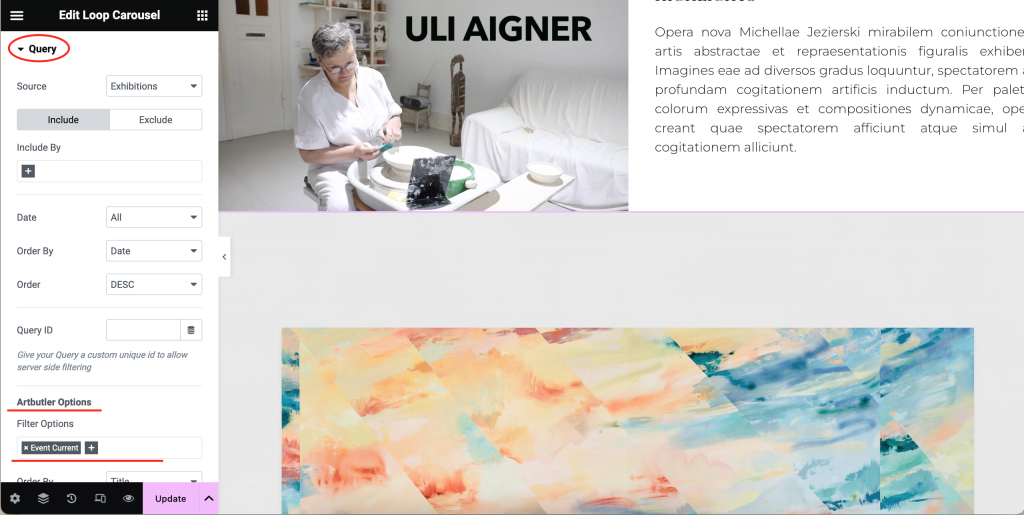
7. Under “Query”, select either “Event Current” or “Event Current + Upcoming” under “Artbutler Options” and set “Order by” to “Event Start Date”.
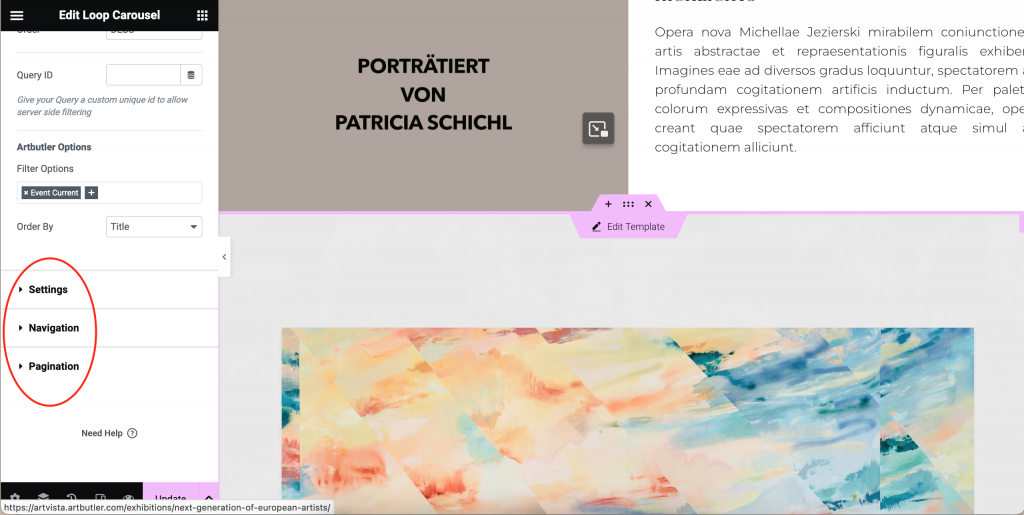
8. Under “Settings”, “Navigation” and “Pagination”, make the desired settings regarding the appearance and behavior of your Carousl container.
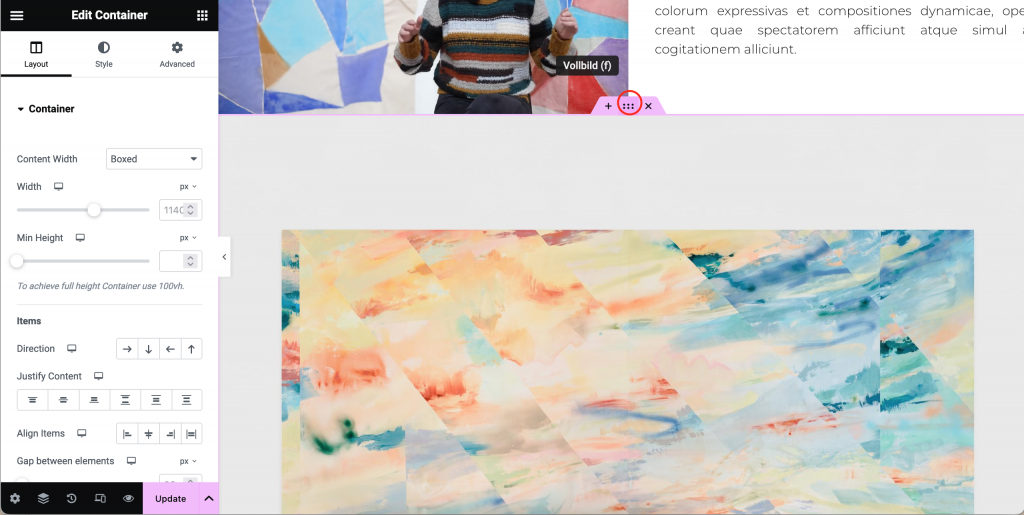
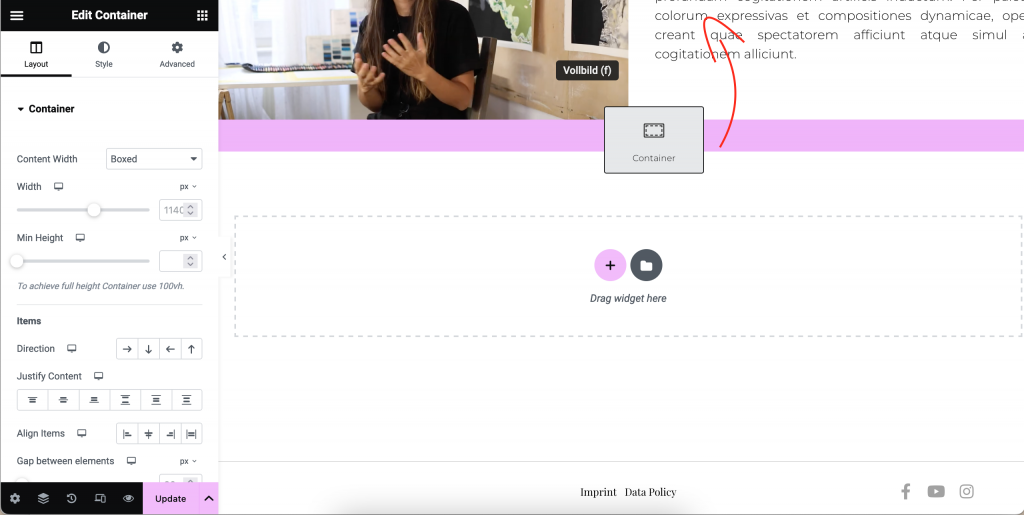
9. Now move the container widget upwards to the top of your homepage, if this is the desired position. To do this, grab the container by the middle dot symbol and drag the container to the desired position (see the following two figures).
Note: It could be that the layout of your page is broken if you do not move the Loop Carousel or the container to the very top of your page. If something has broken here, you will find instructions on how to undo this here.
10. Save and publish: After you have inserted and customized the desired information, save the page and publish it. Done!
Slider in full screen / non-full screen with manually configurable content
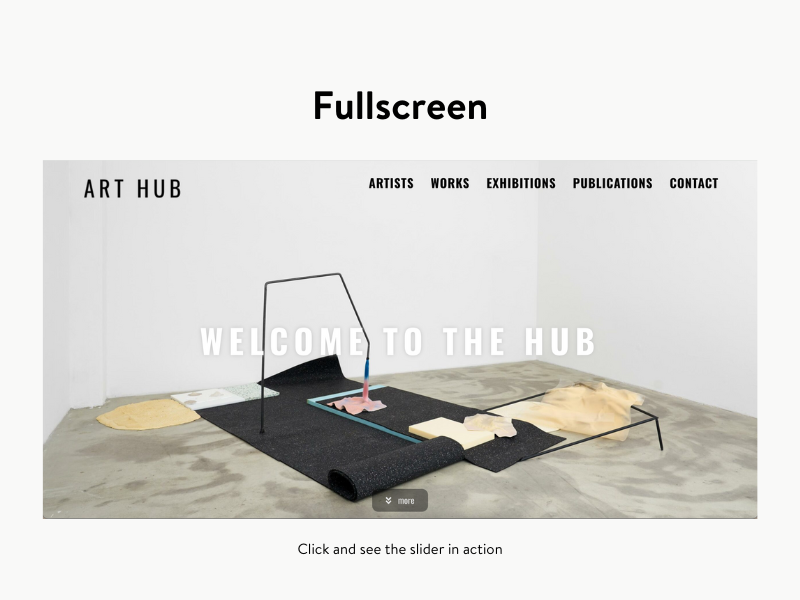
The difference between a full-screen and a non-full-screen slider in Elementor lies in the display size on the website. With a full-screen slider, the image takes up the entire visible screen, creating an immersive visual experience. In contrast, a non-full-screen slider is placed in a predefined area of the page, allowing it to be integrated into a specific layout. The choice between the two depends on design preferences and web design requirements, with each style able to achieve a unique aesthetic effect. See the visual comparison in the following two images:

How to configure full-screen sliders with manual content
- Log in to the WordPress account: Log in to your WordPress admin area.
- Navigate to the homepage: Open the homepage of your website.
- Open Elementor: Go with the mouse pointer to “Edit with Elementor” and a menu will open – here you now click on “Home page”. Now you can start editing your home page.
4. Scroll down to the bottom of the page and click on “Add Templates” in the dashed block in the Elementor editor.
5. Navigate to “My Templates” (1.) and insert one of the container templates with the prefix “Carousel” (2.) via “Insert” (3.). Decide which of the four elements you want to use depending on the size and trim.
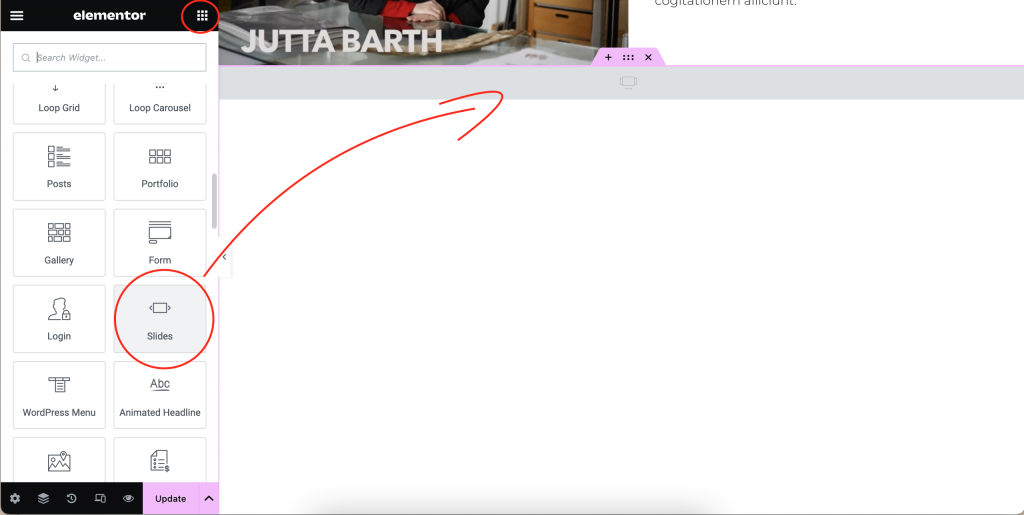
6. Now insert a “Slides” widget by clicking on the tiles at the top right in the Elementor editor, scroll down to the “Slides” widgets. Now drag “Slides” into the carousel container in the right-hand image area.
7. Configure the height to 100 under the content settings.
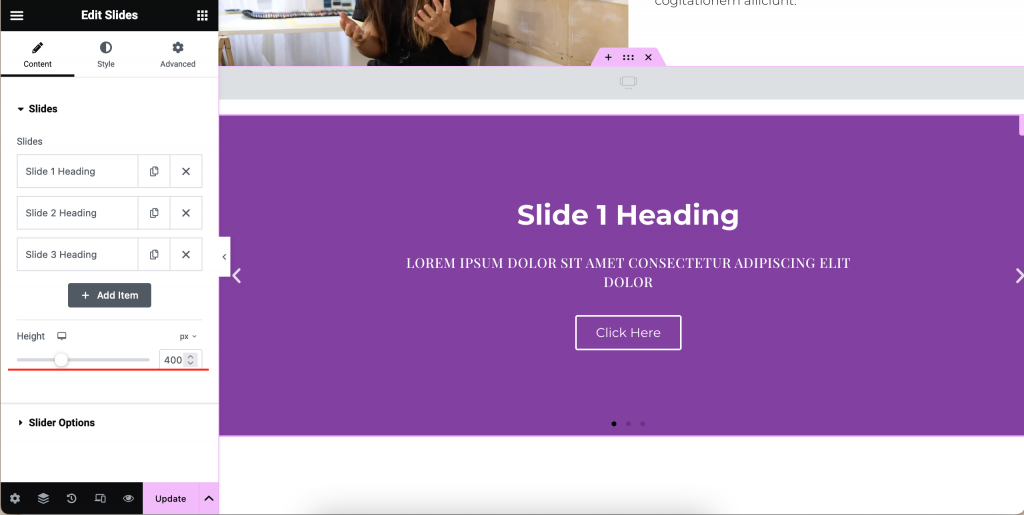
8. Configure the “Slides” widget as described in https://elementor.com/help/slides-widget-pro/. Save, done!
To configure non-full-screen sliders with manual content
Steps 1 – 3 are identical to those described in the example above.
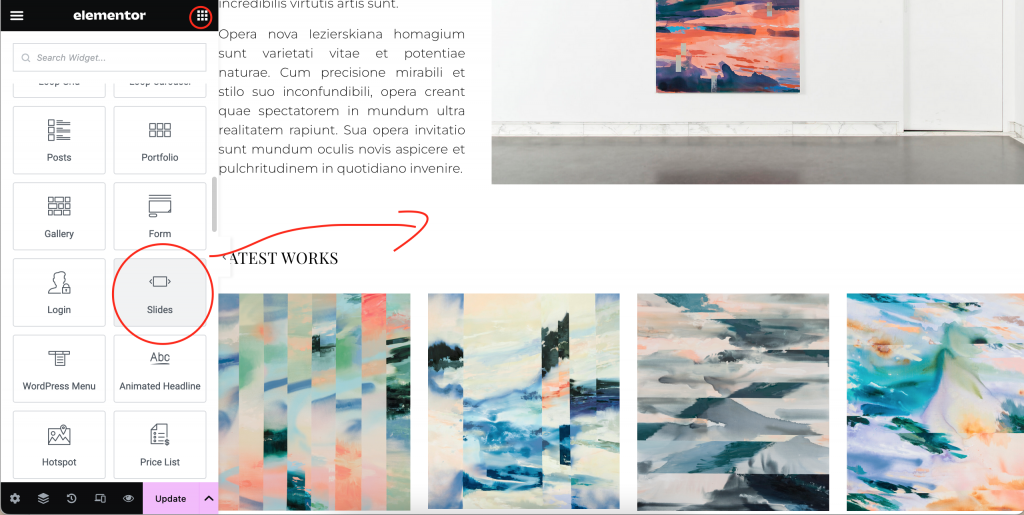
4. for a non-fullscreen slider, insert the “Slides” widget directly at the desired position on the homepage.
5. Configure the “Slides” widget as described in https://elementor.com/help/slides-widget-pro/. Save, done!